Python 进阶

python 并行

Fundamentals of Parallel Programming — Parallel Programming - MolSSI Education documentation

python pytest 和命令行解析

Python Scripting for Computational Molecular Science

python flush() 函数

numba:对循环、函数和 numpy 有加速作用,对 pandas 无效


类型提示

talks/PDF/2024-09-12-mypy.pdf at main · stone-zeng/talks · GitHub

  • 类型提示/标注(Type Hints),提高代码质量和可维护性

  • 从 Python 3.9 开始,PEP 585 引入了对标准集合和其他几个类型的泛型版本的内置支持。这意味着你可以直接使用像 list、dict、set、tuple 等内置数据结构进行类型注解,而不必依赖于 typing 模块中的对应类型

1
2
3
4
5
6
7
int, float, bool, str    # 基本类型 
list, tuple, dict, set # 数据结构类型;对应 typing 模块中的 List, Tuple, Dict, Set
Optional # 可选,指定变量可以是某个类型或者是 None
Type Aliases # 类型别名,简化复杂的类型声明
Union # 联合,允许变量是多个类型中的一个
Literal # 字面量,指定变量的值只能是特定的几个字面量之一
Callable # 指定对象是可调用的,如函数或实现了 __call__ 的对象
1
2
3
4
5
6
7
8
9
10
11
12
13
14
15
16
17
18
19
20
21
22
23
from typing import List, Tuple, Dict, Set, Union, Literal
import numpy as np
import pandas as pd

arr: np.ndarray # NumPy 数组类型提示;无法指定其维数
df: pd.DataFrame # Pandas 数据帧类型提示

num: int = 5

numbers: List[int] = [1, 2, 3]

Dict[str, float]

name: Optional[str] = None

mode: Literal["r", "w", "x"] = "r"

# 函数类型提示;函数的参数和返回值可以有类型提示
def greet(name: str) -> str:
...

def add_num(input: Union[int, str]):
...

类型检查工具

1
2
3
4
5
6
7
8
9
10
11
12
13
14
15
16
# 安装
pip install mypy

# 使用
mypy script.py

# mypy 配置文件 mypy.ini
[mypy]
python_version = 3.11
warn_return_any = True
# warn_unused_configs = True
ignore_missing_imports = True

# Per-module options:
# [mypy-mchammer.*]
# disallow_untyped_defs = False

代码格式化

1
2
3
4
5
6
7
8
9
10
11
12
13
14
15
16
17
# PyPI 安装
pip install black
pip install "black[jupyter]"
pip install isort
# macOS
brew install black ruff isort

# 使用
black file/directory

isort script.py
isort .

ruff

autopep8 script.py # 输出至终端
autopep8 --in-place script.py # 作用到源文件
1
2
3
4
"black-formatter.args": [
"--line-length",
"79"
],

打包

PyScaffold 包:创建、设置、管理 Python 项目的工具

MANIFEST.in 文件:用于自定义和精确控制 Python 包的源码分发包的内容。

MANIFEST.in | fastdataing

设置 python package:python_packages.md

项目打包参考

GitHub - CederGroupHub/alab_control

alab_control/setup.py at main · CederGroupHub/alab_control · GitHub

GitHub - Roy-Kid/modern-python-template: A low dependency project template for Python projects.

python package documentation

Overview — MolSSI Best Practices documentation

Python project 目录结构

1
2
3
4
5
6
7
8
# 结构 1
package_name/
# 结构 2
src/

setup.py
setup.cfg
pyproject.toml

python package 模板参考

GitHub - Quantum-Accelerators/template: A template for Python packages. Developed by the @quantum-accelerators


配置文件

基于 imports 生成 requirements.txt 文件:GitHub - bndr/pipreqs: pipreqs - Generate pip requirements.txt file based on imports of any project. Looking for maintainers to move this project forward.

GitHub - abravalheri/validate-pyproject: Validation library for simple check on `pyproject.toml`

有 3 种文件格式(需要用到的一些文件:requirements.txt README.md MANIFEST.in 等):

  • setup.cfg(适用于不需要复杂构建逻辑的项目)
  • setup.py(常用)
  • pyproject.toml(更现代的方法)

setup.py 示例

1
2
3
4
5
6
7
8
9
10
11
12
13
14
15
16
17
18
19
20
from distutils.core import setup
from setuptools import find_packages
# from setuptools import setup, find_packages

setup(
name="Package Name",
version="0.0.1",
description="description",
long_description=open("README.md").read(),
author="author_name",
author_email="email",
url="url",
packages=find_packages(),
zip_safe=False,
install_requires=[
"numpy>=1.18.1",
],
python_requires=">=3.6",
platforms=["all"],
)

long_description 参数在 setup.py 文件中主要用于提供 package 的详细描述,通常在 PyPI 上显示

setup.py 文件中指定入口点(entry_point)来生成命令行脚本

1
2
3
4
5
6
7
8
9
10
11
12
from setuptools import setup, find_packages

setup(
...
entry_points={
"console_scripts": [
"va_generation=pdepp.model_generation.vacancy:main",
"is_all_generation=pdepp.model_generation.interstitial:main",
"is_va_generation=pdepp.model_generation.interstitial_vacancy:main",
],
},
)

setup.cfg 示例

1
2
3
4
5
6
7
8
9
10
11
12
13
14
15
16
17
18
19
20
21
22
23
24
[metadata]
name = package_name
version = 0.1
author = Your Name
author_email = [email protected]
description = A short description of the project
long_description = file: README.md
long_description_content_type = text/markdown
url = https://example.com/project
classifiers =
Programming Language :: Python :: 3
License :: OSI Approved :: MIT License
Operating System :: OS Independent

[options]
packages = find:
install_requires =
requests
numpy

[options.extras_require]
dev =
pytest
flake8

pyproject.toml 文件

matplotlib pyproject.toml

  • 基于 PEP 518 标准提出,旨在提供一个统一的配置格式来替代多个配置文件如 setup.pysetup.cfgrequirements.txt 等)的需要
  • [build-system] - 指定构建系统的要求
  • [tool.some_tool] - 配置特定工具的选项(如 pytest、ruff、isort 等)
1
2
3
4
5
6
7
8
9
10
11
12
13
14
15
16
17
18
19
20
21
22
23
24
25
26
27
28
29
30
31
32
33
34
35
36
37
38
39
40
[build-system]
requires = [
"setuptools>=65.0.0",
"wheel",
]
build-backend = "setuptools.build_meta"

[project]
name = "spt"
version = "0.2.3"
description = "Scientific matplotlib plot rcParams configuration template python package."
authors = [
{name = "yangsl", email = "[email protected]"},
]
maintainers = [
{name = "yangsl", email = "[email protected]"},
]
dependencies = [
"matplotlib>=3.7,<3.8",
"numpy>=1.20.0",
]
requires-python = ">=3.8"
classifiers = [
"Programming Language :: Python :: 3"
]

[project.optional-dependencies]
examples = [
"pandas",
"scikit-learn",
]

[project.urls]
documentation = "https://github.com/Bit-Part-Young/spt"
repository = "https://github.com/Bit-Part-Young/spt"

[project.entry-points.console_scripts]
va_generation = "pdepp.model_generation.vacancy:main"
is_all_generation = "pdepp.model_generation.interstitial:main"
is_va_generation = "pdepp.model_generation.interstitial_vacancy:main"

其他相关设置

1
2
3
4
5
6
7
8
9
10
11
12
13
14
15
16
17
18
19
20
21
22
23
24
25
26
27
[project]
dynamic = ["version"]

[tool.setuptools_scm]
write_to = "mech2d/_version.py"

[tool.black]
line-length = 88
include = '\.pyi?$'
exclude = '''
/(
\.git
| \.mypy_cache
| \.venv
| _build
| build
| dist
)/
'''

[tool.pytest.ini_options]
minversion = "6.0"
addopts = "-ra -q"
testpaths = [
"tests",
"integration",
]

  • 设置 package 的数据文件路径
1
2
3
4
import pkg_resources

# 模型模板文件路径
MODEL_DATA_PATH = pkg_resources.resource_filename("pdepp", "data/model")
1
2
3
4
5
6
7
8
9
package_data={
"pdepp": [
"data/model/*",
"data/excute-scripts/1-Al/*",
"data/excute-scripts/2-Fe/*",
"data/excute-scripts/3-Zr/*",
"data/excute-scripts/ELASTIC/*",
],
},

发布到 PyPI

  • PyPITestPyPI(可选) 注册账号;注册好并登录后需先设置 2FA(安卓端可使用 Google 身份验证器 app),之后创建 ~/.pypirc 配置文件(建议使用 API 的形式,而非用户名、密码的形式)

  • 配置文件 .pypirc 示例

1
2
3
4
5
6
[distutils]
index-servers=pypi

[pypi]
username = __token__
password = pypi-AgEI...
  • 安装 twine(上传 Python package 到 PyPI 的工具)
1
2
3
pip install -U twine

pip install -U build # 安装 pyproject.toml 构建工具
  • 构建 package
1
2
3
python setup.py sdist bdist_wheel

python -m build # 使用 pyproject.toml 构建
  • 上传到 TestPyPI 进行测试(可选)
1
twine upload --repository testpypi dist/*
  • 检查
1
twine check dist/*
  • 上传到 PyPI
1
twine upload dist/*

GitHub - pypa/gh-action-pypi-publish: The blessed GitHub Action, for publishing your distribution files to PyPI: https://github.com/marketplace/actions/pypi-publish


Jupyter Notebook

  • 在 Jupyter Notebook 中使用 Python 时,在函数或类的方法后添加 ?? 可以查看其 docstring

  • Jupyter Notebook ipynb 文件转 HTML 格式

    • 使用 jupyter nbconvert --to html notebook.ipynb
    • VSCode,打开 ipynb 文件,在 “大纲” 右侧点击三个点,选择导出成 HTML(需安装 notebook 包)
  • 代替 Jupyter Notebook:GitHub - marimo-team/marimo

  • 在终端中运行 Jupyter:GitHub - joouha/euporie: Jupyter notebooks in the terminal

1
2
3
euporie-preview notebook.ipynb    # 预览
euporie-notebook notebook.ipynb # 编辑
euporie-console # 连接 Jupyter kernel 并可在控制台会话中编辑交互运行代码
  • 魔法函数 line magic function
1
2
3
4
5
6
7
%lsmagic        # 列出所有的魔法函数

%time # 测量单个语句的执行时间
%timeit # 对单个语句多次运行,以计算一个平均运行时间
%%bash # 运行 Bash 命令;在 cell 开头添加此行
!ls # 支持部分 Linux 原生命令,如 pwd cat env history 等
%autosave 500 # 每 500s 自动保存
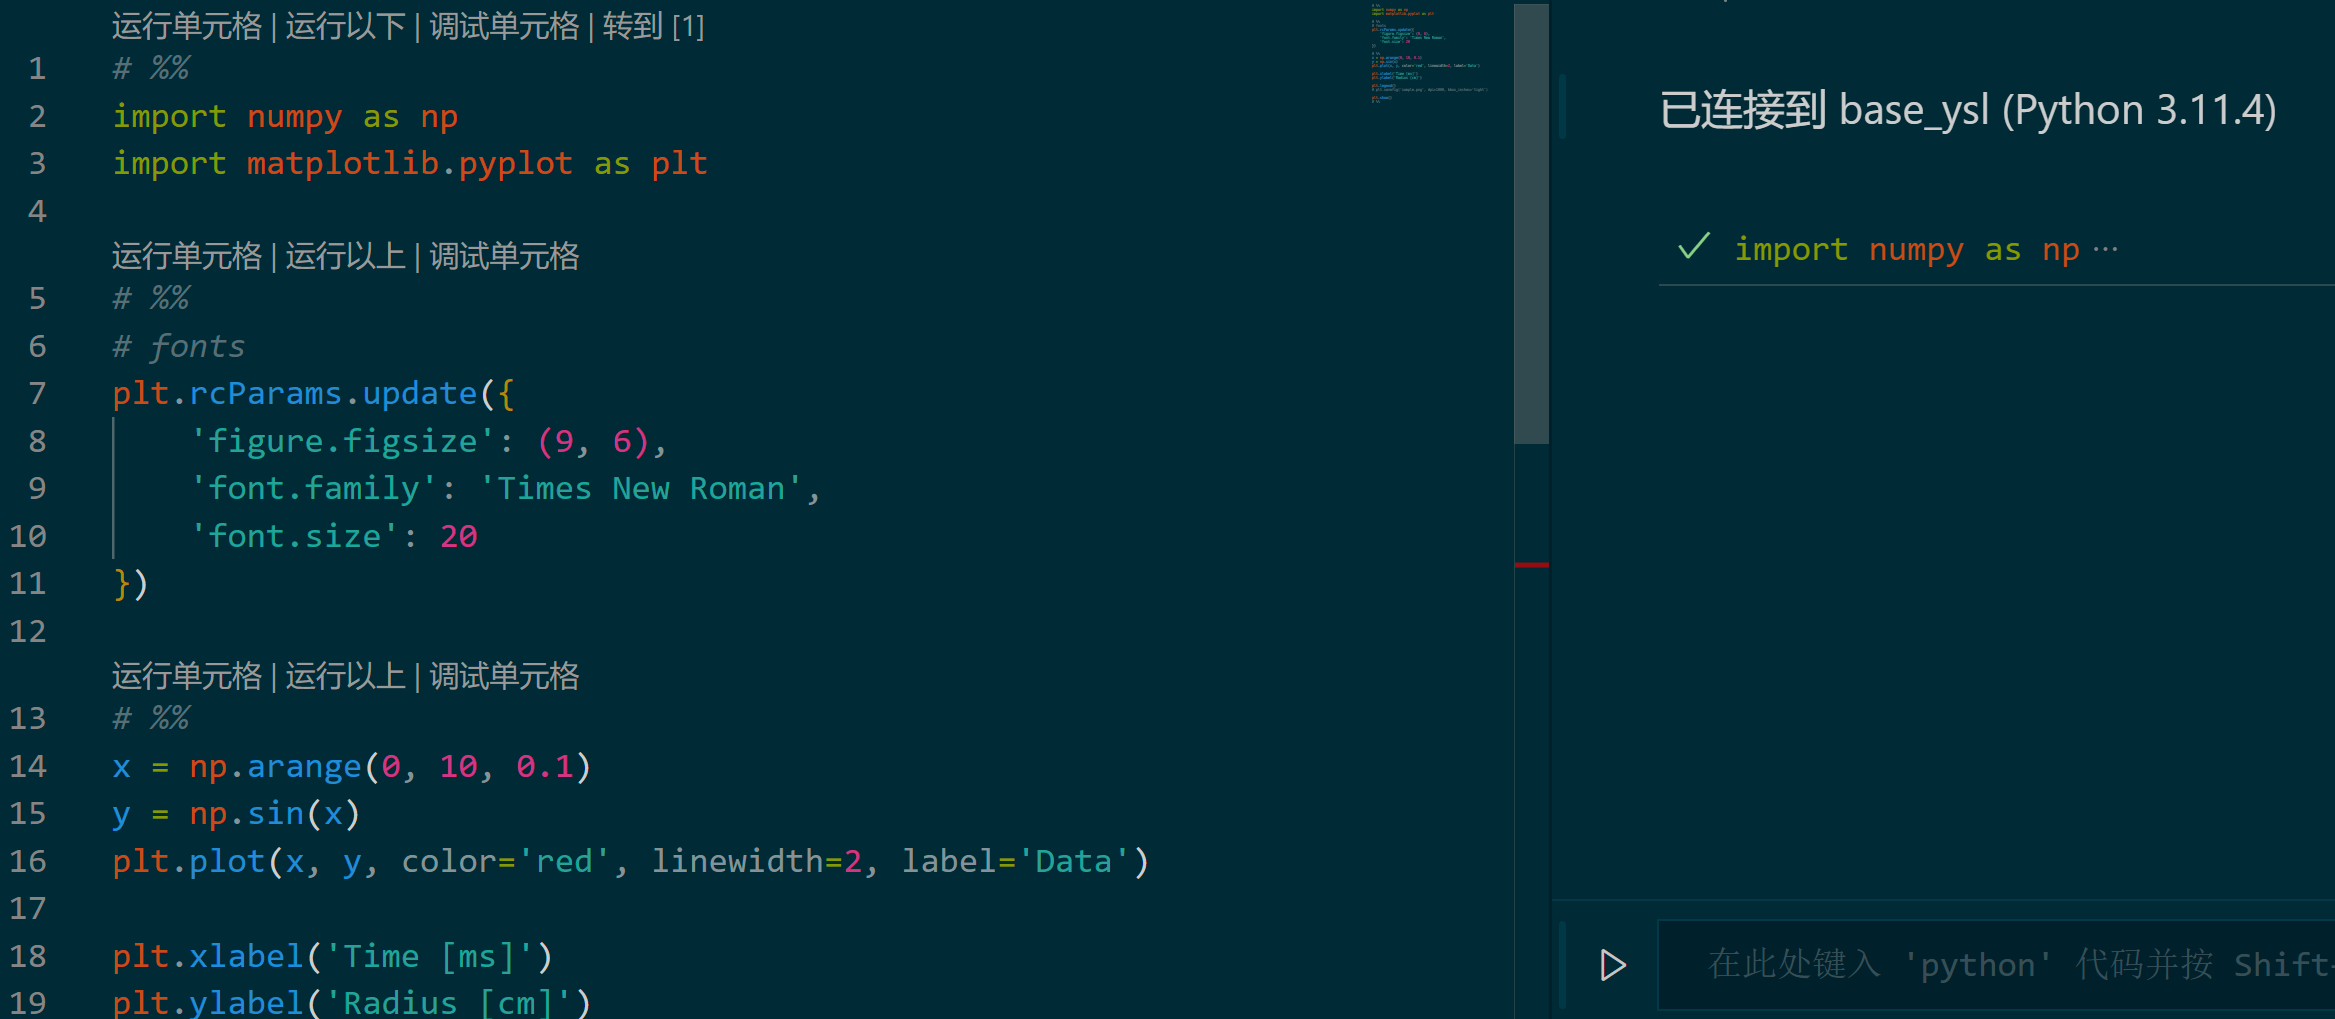
  • VSCode,在 Python 脚本中的代码前添加 # %%,可像 Jupyter Notebook 一样运行一段代码;添加 # %% [markdown],可编写 Markdown

image.png


IPython

1
2
3
4
5
6
7
8
9
10
11
12
XXX?               # 一个问号;查看类或函数的 docstring
XXX?? # 两个问号;查看类或函数的源码
os.*dir*? # 通配符搜索函数
%edit # 进入编辑器写代码;保存并退出时运行代码
%edit -p # 打开上次的文件
%pdb # 自动开启调试
%xmode # 输出异常的模式:Minimal、Plain、Context、Verbose
%save file.py 1-4 # 将 IPython 中的 session 内容保存成 Python 文件
%whos # 列出所有变量
%paste # 粘贴时可清除当剪贴板中的 Python 代码中的 ">" 符号,使得代码不会报错
%%ruby # 执行其他编程语言的代码
%rerun ~N/ # 运行之前的第 N 个 session 中的代码

mpi4py

Python多进程并行编程实践-mpi4py的使用 - 知乎

分布式内存

共享式内存

1
2
# 安装
python -m pip install mpi4py
1
2
3
4
5
6
7
8
9
10
11
12
13
14
from mpi4py import MPI 

comm = MPI.COMM_WORLD
rank = comm.Get_rank()
size = comm.Get_size()


# 阻塞通信
# dest 消息的目标进程的标识符
# tag 消息的标签 整数值 发送者和接收者可以使用相同的标签来匹配消息
comm.send(data, dest=1, tag=11)

# 非阻塞通信
comm.isend(data, dest=1, tag=11)

非阻塞发送通常用于提高并行性,允许发送者继续执行其他任务,而不必等待接收者。但需要小心,确保在接收之前不要修改发送的数据,以免出现数据一致性问题。通常需要使用 comm.irecv 或其他方法来等待非阻塞发送的消息。


其他

“version bump” 版本号更新

版本号格式:以主要版本号.次要版本号.修补版本号

更新版本号原因:

  • 新功能添加:当软件新增功能时,可能会增加主要或次要版本号。
  • 错误修复:修复错误或进行小的改进通常会增加修补版本号。
  • API 变更:如果更改了软件的 API 或其他重大更改,通常会增加主要版本号。

PyTorch 简单用法:PyTorch - Isshiki修’s Notebook

1
2
3
4
5
# 对列表中的元素进行排列组合
from itertools import combinations

chemical_symbols = ["Ti", "Al", "Nb", "Mo", "Zr"]
element_list_combinations = list(combinations(chemical_symbols, 3))